
Hello, home bakers and kitchen adventurers!
The Ultimate Guide to Making Fluffy Sourdough Discard Donuts at Home
Have you ever stared at your jar of sourdough starter discard and wondered if it could be transformed into something truly spectacular? Instead of tossing it out, what if you could whip up a batch of warm, pillowy, and irresistibly delicious donuts? Today, we’re diving deep into the world of turning that precious leftover starter into a sweet, fried treat that will have your whole family asking for more.
Making these Sourdough Discard Donuts at home is not only incredibly satisfying but also a fantastic way to reduce food waste and enjoy a fresh, preservative-free bakery-style snack. This guide will walk you through creating one of the best sourdough discard treats you’ll ever taste.
Table of Contents
Materials & Supplies
Before we begin, let’s gather everything you’ll need. Having all your ingredients and tools measured and ready—a practice chefs call “mise en place”—makes the entire process smoother and more enjoyable.
For the Donut Dough:
- All-Purpose Flour (2 cups): The structural base for our donuts. You can also use bread flour for a chewier texture.
- Active Sourdough Starter Discard (1/2 cup): This is the star of the show! It should be unfed, straight from the fridge. It adds flavor, tenderness, and a bit of lift.
- Whole Milk (1/2 cup, warmed): Helps activate the yeast and creates a rich, soft crumb. You can use 2% milk, but whole milk yields the best results.
- Granulated Sugar (1/4 cup): For sweetness in the dough itself.
- Instant Yeast (2 1/4 teaspoons): One standard packet. This ensures a reliable and quick rise.
- Unsalted Butter (3 tablespoons, melted): Adds richness and softness to the donuts.
- Large Egg (1, room temperature): Binds the ingredients and adds structure.
- Salt (1/2 teaspoon): Balances the sweetness and enhances the overall flavor.
For Frying & Coating:
- Neutral Oil (for frying): Canola, vegetable, or peanut oil work best as they have a high smoke point and a neutral flavor.
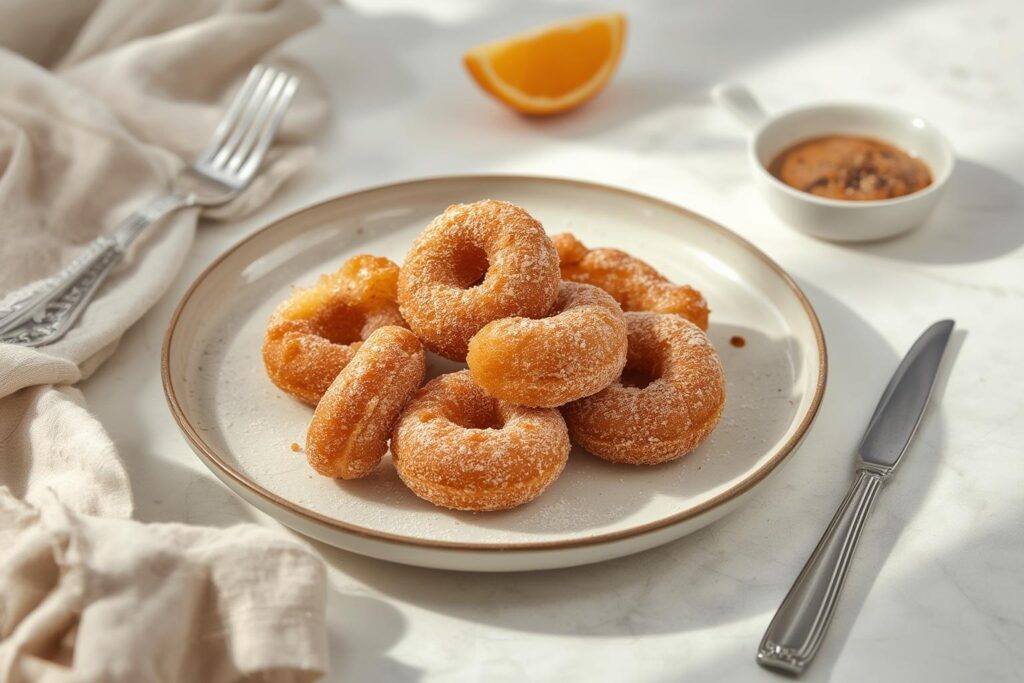
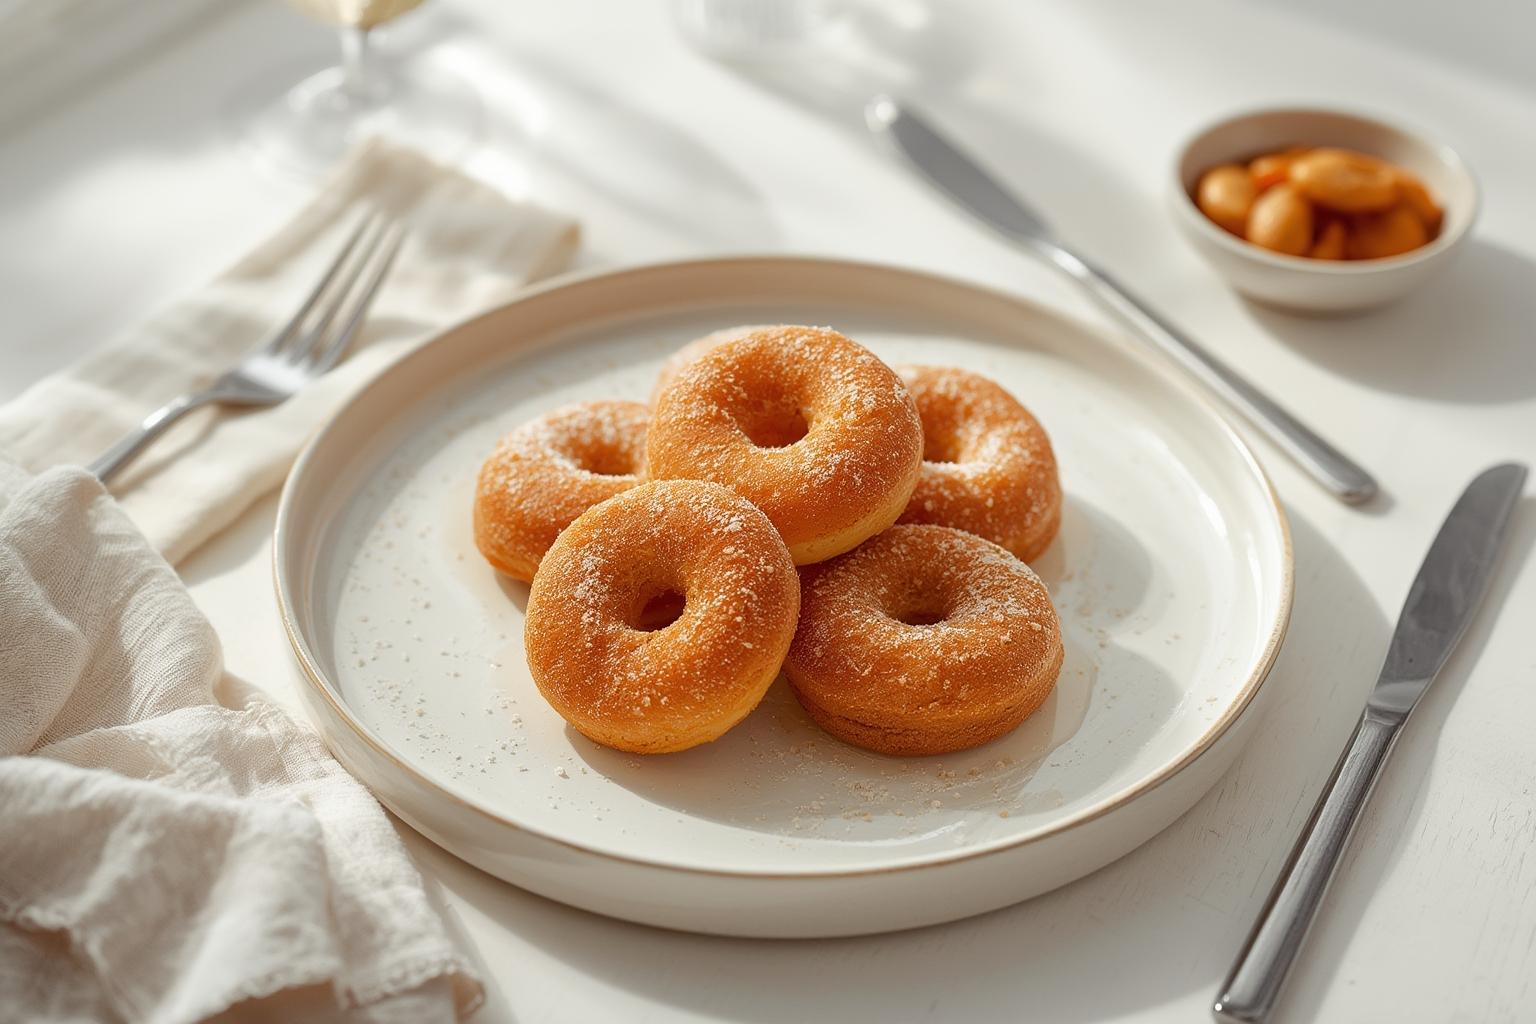
- Granulated or Powdered Sugar (for coating): Use powdered sugar for a classic snow-dusted look or granulated for a sparkly, crunchy exterior. Cinnamon sugar is also a fantastic option!
Essential Kitchen Tools:
- Large mixing bowl or stand mixer with a dough hook
- Measuring cups and spoons
- Instant-read thermometer (for oil)
- Heavy-bottomed pot or Dutch oven (for frying)
- Wire cooling rack
- Parchment paper
- Rolling pin and a donut cutter (or two biscuit cutters of different sizes)
Timing / Cooking Schedule
Planning your bake is key, especially with yeasted doughs. Here’s a realistic breakdown to help you schedule your donut-making session.
- Prep Time: 20 minutes
- Rising Time: 1 to 1.5 hours
- Frying & Coating Time: 30 minutes
- Total Time: Approximately 2 to 2.5 hours
This isn’t a 30-minute weeknight meal, but it’s a perfect weekend project or a fun activity for a rainy afternoon. The hands-on time is relatively short; most of the wait is for the dough to rise, giving you plenty of time to clean up or prep your coffee.
Step-by-Step Instructions
Let’s get to the fun part! Follow these steps closely for perfect, fluffy donuts every time.
1. Activate the Yeast: In a small bowl, combine the warmed milk (about 110°F), 1 teaspoon of the granulated sugar, and the instant yeast. Give it a gentle stir and let it sit for 5-10 minutes until it becomes foamy. This “blooming” process confirms your yeast is alive and ready to work.
2. Combine Wet Ingredients: In the bowl of your stand mixer or a large mixing bowl, whisk together the sourdough discard, the remaining sugar, the melted butter, and the room temperature egg until smooth.
3. Make the Dough: Pour the foamy yeast mixture into the wet ingredients. Add the salt and half of the flour. Mix on low speed (or with a wooden spoon) until just combined. Gradually add the remaining flour, mixing until a soft, slightly sticky dough forms.
4. Knead to Perfection: If using a stand mixer, knead on medium-low speed for 5-7 minutes until the dough is smooth, elastic, and pulls away from the sides of the bowl. If kneading by hand, turn the dough onto a lightly floured surface and knead for 8-10 minutes. This is a crucial step for developing gluten, which gives the donuts their structure and chew.
5. First Rise: Lightly grease a clean bowl with oil or butter. Place the dough inside, turning it once to coat. Cover the bowl with a clean kitchen towel or plastic wrap and place it in a warm, draft-free spot. Let it rise until doubled in size, about 1 to 1.5 hours. This is where the magic of using your sourdough discard treats base really shines, developing a complex flavor.
6. Shape the Donuts: Once risen, gently punch down the dough to release the air. Turn it out onto a lightly floured surface and roll it to about 1/2-inch thickness. Use your donut cutter to cut out as many donuts and donut holes as you can. Place them on a parchment-lined baking sheet, leaving space between them.
7. Second Rise (The Proof): Cover the cut donuts loosely with a kitchen towel and let them rest for another 30-45 minutes. They should look puffy and visibly larger. This second, shorter rise ensures a light and airy final product.
8. Heat the Oil: While the donuts are proofing, fill your heavy-bottomed pot with about 2-3 inches of oil. Heat it slowly over medium heat to 350-360°F (175-180°C). Use your thermometer to monitor the temperature closely; if it’s too hot, the donuts will burn on the outside before cooking inside.
9. Fry the Donuts: Carefully place 2-3 donuts into the hot oil at a time, being sure not to overcrowd the pot. Fry for about 60-90 seconds per side, until they are a deep golden brown. Use a slotted spoon or spider strainer to gently flip them and then remove them from the oil.
10. Drain and Coat: Place the hot donuts on a wire cooling rack set over a baking sheet to drain excess oil for just a minute. While still warm, toss them immediately in your sugar or cinnamon-sugar mixture. The warmth helps the coating stick perfectly.
11. Serve: These Sourdough Discard Donuts are absolutely best enjoyed warm and fresh! The contrast of the slightly crisp exterior and the soft, tender interior is pure magic.
Nutritional Benefits & Advantages
While donuts are certainly a treat, making them at home gives you significant control and advantages. You avoid the long list of preservatives, artificial flavors, and mystery oils found in many store-bought or chain donuts. You are using real, simple ingredients.
The primary benefit here is sustainability and cost-effectiveness. You’re taking something you might otherwise discard and turning it into a delicious dessert, which is a win for your wallet and the planet. You also get the unparalleled satisfaction of creating something delicious from scratch, filling your home with an amazing aroma and your belly with a truly fresh, high-quality treat.
Tips, Alternative Methods, or Cooking Advice
- No Donut Cutter? No Problem! Use a 3-inch round cookie or biscuit cutter for the main shape and a 1-inch cutter (or the cap of a water bottle) for the center hole.
- Flavor Variations: After coating in sugar, you can glaze your donuts. Whisk together powdered sugar, a splash of milk, and a drop of vanilla extract for a simple glaze. Add cocoa powder for a chocolate version or a bit of lemon zest for a bright, zesty twist.
- Dietary Swaps: For a dairy-free version, use a plant-based milk (like oat or almond milk) and a vegan butter substitute.
- Air Fryer Method: While deep frying gives the classic texture, you can try an air fryer method for a lower-fat option. Spray the proofed donuts with oil and air fry at 350°F (175°C) for 4-5 minutes, flipping halfway through. They won’t be identical but are still a tasty alternative.
Common Mistakes to Avoid
Even experienced bakers can run into issues. Here are the most common pitfalls and how to avoid them:
- Oil Temperature is Wrong: This is the #1 mistake. If the oil is too cool, the donuts will absorb too much oil and become greasy. If it’s too hot, they’ll brown too quickly on the outside while remaining raw inside. Trust your thermometer!
- Over-kneading or Under-kneading: The dough should be smooth and elastic. If it’s too stiff and tough, you’ve likely over-kneaded. If it’s a sticky, slack mess that tears easily, it’s under-kneaded. Aim for that perfect windowpane test where you can stretch a small piece thin enough to see light through it without it tearing.
- Rushing the Rises: Patience is a virtue in baking. Don’t skip or shorten the rise times. A proper rise develops flavor and creates the light, airy structure we all love in a donut.
- Handling Proofed Donuts Too Roughly: After the second rise, the dough is very delicate. Use a light touch when transferring them to the hot oil to avoid deflating them.
Storage & Maintenance Tips
Donuts are truly at their peak within the first few hours of being made. However, if you have leftovers (which is a big “if”!), here’s how to store them.
- Storing Leftovers: Place completely cooled donuts in an airtight container at room temperature for up to 1-2 days. They will lose some of their fluffiness but will still be tasty.
- Freezing: For longer storage, freeze the un-coated donuts. Once they’ve cooled after frying, place them in a single layer on a baking sheet to freeze solid, then transfer to a freezer bag. They’ll keep for up to 3 months. Thaw at room temperature and warm them slightly before coating in sugar.
- Reheating: To bring day-old donuts back to life, a quick 5-10 second zap in the microwave will soften them up. For a crisper exterior, warm them in an air fryer or a 300°F (150°C) oven for 3-4 minutes.
Conclusion
There you have it—everything you need to transform humble sourdough discard into a batch of spectacular, bakery-worthy donuts. This recipe not only saves you money and reduces waste but also fills your kitchen with the incredible scent of fresh, homemade goodness. We hope this guide empowers you to get creative in the kitchen and see your sourdough starter as a source of endless delicious possibilities. The next time you’re about to discard that starter, remember the fluffy, sweet, and satisfying Sourdough Discard Donuts you can be making. Give this recipe a try, and don’t forget to leave a comment below to let us know how they turned out or share your favorite creative sourdough discard treats!
FAQs
1. Can I use active sourdough starter instead of discard?
Yes, you absolutely can! An active, recently-fed starter will give your donuts an even better rise and a more pronounced tangy flavor. The recipe is very forgiving.
2. My donuts didn’t rise much. What went wrong?
This usually points to one of two things: your yeast was inactive, or the proofing environment was too cold. Make sure your yeast is fresh and that you place your dough in a warm, draft-free spot for both rise cycles.
3. How can I make sure my donuts are cooked all the way through?
Maintaining the correct oil temperature (350-360°F) is key. This allows the donut to cook evenly. Don’t make your donuts too thick (no more than 1/2 inch), and use a thermometer to check for doneness if you’re unsure.
4. Is it necessary to use a thermometer for the oil?
While it’s possible to test the oil with a small piece of dough (it should sizzle immediately but not burn), an instant-read thermometer is the most reliable way to guarantee perfect results and avoid greasy or burnt donuts.
5. Can I make the dough ahead of time?
Yes! You can prepare the dough, let it do its first rise, then punch it down, cover it tightly, and refrigerate it overnight. The next day, let it come to room temperature for about 30-45 minutes before rolling, cutting, and doing the second rise.
