
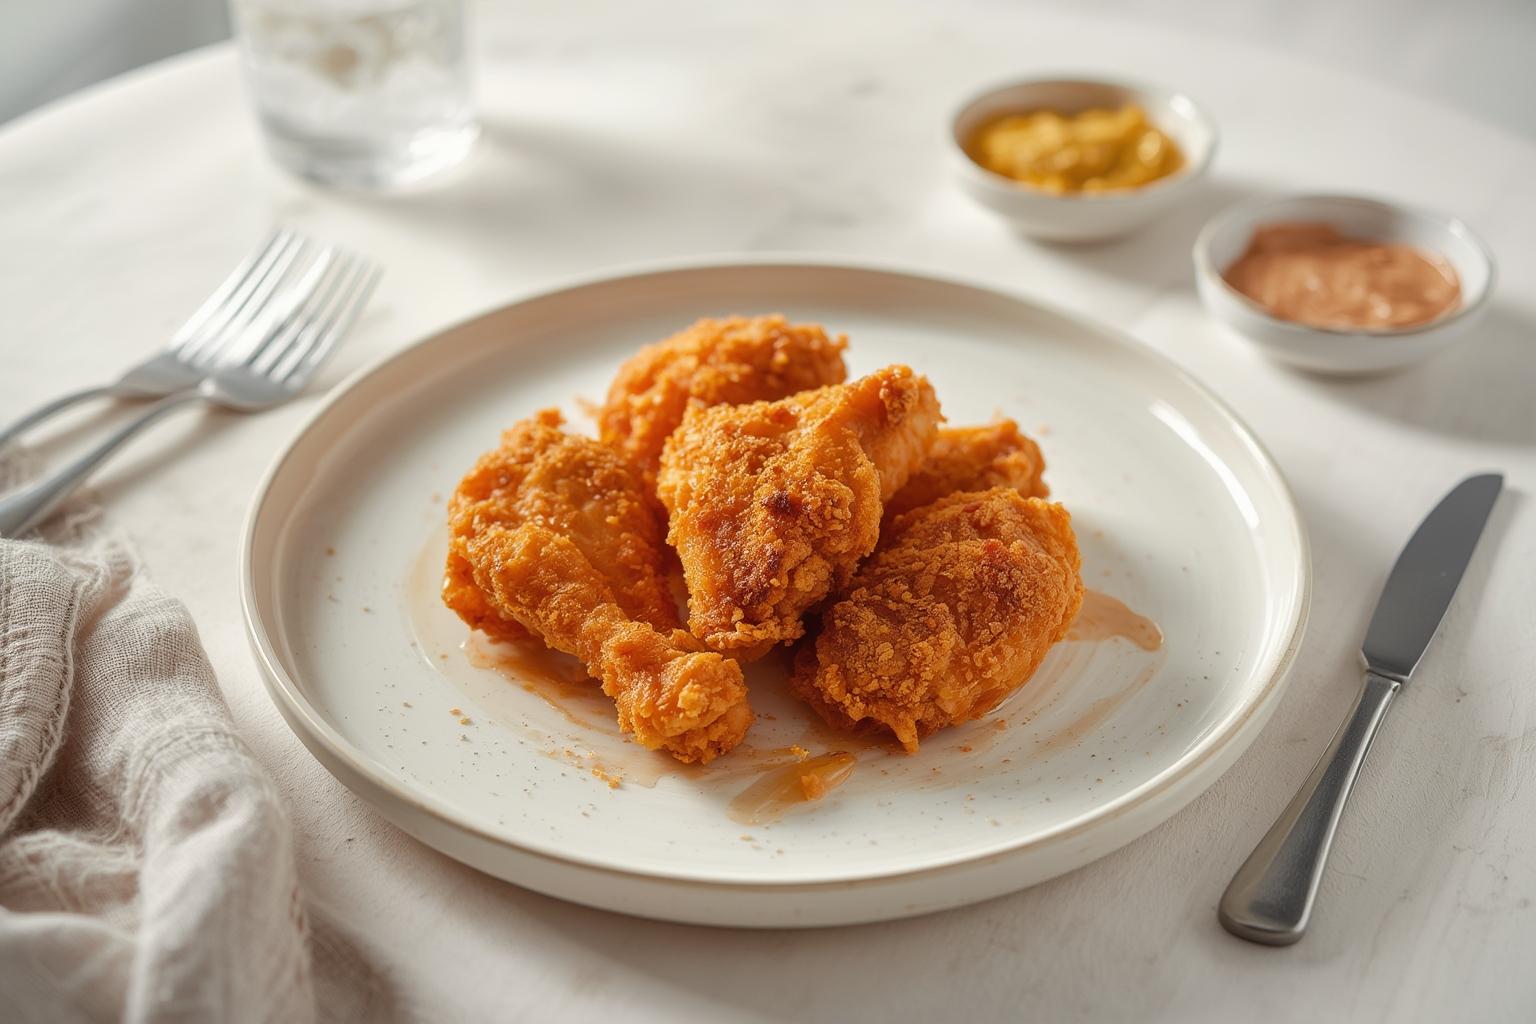
Ever wondered why your favorite takeout fried chicken tastes so irresistibly good, yet making it at home feels intimidating? You’re not alone! But I’m here to tell you that creating that perfect, golden-brown crunch right in your own kitchen is not only possible—it’s a game-changer for your dinner rotation. When you make Fried Chicken at home, you gain complete control over the ingredients, ensuring every bite is fresh, flavorful, and free from unwanted additives. It’s more cost-effective than frequent takeout and gives you the confidence to cook for family and friends. Plus, there’s nothing quite like the aroma of crispy fried chicken sizzling in the pan to make a house feel like a home.
Table of Contents
Materials & Supplies
To create this classic recipe, you’ll need a well-stocked pantry and a few key kitchen tools. Here’s everything required for a standard batch serving 4-6 people.
Ingredients & Seasonings
- Chicken: 3-4 lbs of chicken pieces (bone-in, skin-on thighs and drumsticks work best for juiciness; you can also use boneless skinless breasts or wings for variation).
- Buttermilk: 2 cups (essential for tenderizing the meat and adding tangy flavor; for a dairy-free alternative, use full-fat coconut milk mixed with a tablespoon of vinegar or lemon juice).
- All-Purpose Flour: 2 cups (forms the base of the dredge; you can swap with gluten-free all-purpose blend if needed).
- Seasoning Blend:
* 1 tbsp paprika (smoked or sweet, for color and depth)
* 2 tsp garlic powder
* 2 tsp onion powder
* 1 tsp dried thyme
* 1 tsp dried oregano
* 1 tbsp kosher salt (adjust to taste; using coarse salt helps with even seasoning)
* 1 tsp black pepper
* 1/2 tsp cayenne pepper (optional, for a mild heat; increase if you like it spicier)
- Frying Oil: 4-6 cups of neutral, high-smoke-point oil (vegetable, canola, peanut, or avocado oil are all excellent choices; avoid olive oil for high-heat frying).
Kitchen Tools
- Large Mixing Bowls: At least two—one for the buttermilk marinade and one for the flour dredge.
- Whisk: For combining dry ingredients smoothly.
- Deep Skillet, Dutch Oven, or Heavy Pot: Essential for frying; a deep, heavy-bottomed pot (like a cast-iron Dutch oven) retains heat evenly and prevents splatters. Aim for a depth of at least 3 inches.
- Tongs or a Spider Skimmer: For safely handling and flipping the chicken without piercing the skin.
- Thermometer: A candy/deep-fry thermometer is ideal for monitoring oil temperature (aim for 350°F/175°C); an instant-read meat thermometer is also crucial to ensure the chicken reaches 165°F (74°C) internally.
- Rack or Paper Towels: A wire cooling rack set over a baking sheet is best for draining excess oil without making the crust soggy; paper towels are a good alternative if you don’t have a rack.
- Cutting Board and Knife: For prepping the chicken if it comes in larger pieces.
- Measuring Cups and Spoons: For accuracy in your dredge and marinade.
- Optional but Helpful: A cast-iron skillet for an even crispier, oven-finishing method (see tips section).
Timing / Cooking Schedule
Understanding the timeline is key to a stress-free cooking experience. Here’s a breakdown to help you plan.
- Prep Time: 15-20 minutes (plus optional marinating time of 30 minutes to 4 hours in the fridge). This includes mixing your marinade and dredge, and coating the chicken.
- Cook Time: 25-35 minutes. Frying time varies based on the size of your chicken pieces—smaller wings cook faster, while larger thighs take a bit longer. You’ll fry in batches to avoid overcrowding the pot, which is crucial for maintaining oil temperature.
- Total Time: 40 minutes to 1 hour (without extended marination). If you choose to marinate for deeper flavor, factor in an extra hour. This recipe is perfectly manageable for a weekend feast but might be tight for a quick weeknight dinner unless you prepare components ahead. It’s an excellent meal prep project: marinate the chicken the night before, and dinner is halfway done!
Step-by-Step Instructions
Follow these steps closely for a foolproof, juicy interior and a crunchy, golden crust. The secret is in the double-dredge technique and proper oil temperature management.
1. Marinate the Chicken: In a large mixing bowl, whisk together the buttermilk with 1 teaspoon of your salt and the cayenne pepper (if using). Pat your chicken pieces completely dry with paper towels—this is critical for the marinade to stick and for the crust to adhere. Submerge the chicken in the buttermilk, ensuring each piece is fully coated. Cover the bowl and refrigerate for at least 30 minutes, or up to 4 hours. This step is what separates a good Fried Chicken from a great one, as the lactic acid in the buttermilk tenderizes the meat.
2. Prepare the Dredge: While the chicken marinates, in a separate large bowl, whisk together the flour and all the remaining seasonings (paprika, garlic powder, onion powder, thyme, oregano, salt, and pepper). For an extra-crunchy crust, you can remove 1/4 cup of flour and set it aside to add later. Ensure your seasoning blend is fully incorporated—no one wants a clump of just salt or garlic powder in their crust!
3. Heat the Oil: Pour your oil into your chosen heavy pot (Dutch oven or deep skillet) to a depth of about 2-3 inches. Heat over medium-high heat until it reaches 350°F (175°C) on your thermometer. If you don’t have a thermometer, a good test is to drop a small pinch of flour into the oil; if it sizzles vigorously and turns golden within 30-60 seconds, your oil is ready. Adjust the heat as needed to maintain this temperature; if it gets too hot, the outside will burn before the inside cooks.
4. Dredge the Chicken: Working with one piece at a time, remove it from the buttermilk, letting the excess drip off (but don’t shake it bone-dry). Dredge it thoroughly in the seasoned flour, pressing firmly to ensure the coating clings to every nook and cranny. For a thicker, craggier crust, you can dip it back into the buttermilk for a second and then back into the flour for a double coat. This is where you create the signature texture of crispy fried chicken. Shake off any loose flour and set the coated piece on a wire rack or clean plate. Repeat with all pieces, being careful not to let them crowd together (this can make the flour soggy).
5. Fry in Batches: Once the oil is hot, carefully lower 3-4 pieces into the pot using tongs—don’t just drop them in, as this will cause oil to splatter. Don’t overcrowd the pot; this will lower the oil temperature too much, leading to greasy, soggy chicken. Fry for 10-12 minutes for dark meat (thighs, drumsticks) or 8-10 minutes for white meat (breasts), flipping the chicken halfway through to ensure even browning. The chicken is done when it’s a deep golden brown, crispy, and the internal temperature reaches 165°F (74°C) when tested with a meat thermometer inserted into the thickest part (avoiding the bone).
6. Drain and Rest: Use tongs to transfer the cooked chicken to a wire rack set over a baking sheet (this is better than paper towels, as it allows air to circulate underneath, keeping the bottom crust crisp). Lightly sprinkle with a tiny pinch of flaky salt while still hot. Let the chicken rest for 5-10 minutes before serving. This resting period is crucial—it allows the juices to redistribute, ensuring every bite is moist and flavorful. Repeat the frying process with the remaining chicken, making sure to bring the oil back to 350°F (175°C) between batches.
Nutritional Benefits & Advantages
While fried chicken is considered an indulgence, making it at home allows you to prioritize freshness and control. You’re using real, whole ingredients without the preservatives, artificial flavors, or excessive sodium often found in restaurant versions. By choosing high-quality chicken (like organic or free-range if available), you’re getting a better nutrient profile with more omega-3 fatty acids and a more natural animal diet.
Cooking at home also supports sustainability. You can buy chicken in bulk with less packaging waste, use reusable containers for storage, and minimize food waste by planning portions precisely. From a cost perspective, a homemade batch is significantly cheaper than ordering from a fast-food chain or restaurant. The main advantage, however, is the unparalleled flavor and texture you achieve by controlling every step. You decide the spice level, the type of oil, and the cook time—resulting in a dish that’s perfectly tailored to your taste and superior in quality.
Tips, Alternative Methods, or Cooking Advice
- Air Fryer Method: For a lighter version, preheat your air fryer to 375°F (190°C). Spray the dredged chicken pieces generously with cooking spray. Arrange them in a single layer in the air fryer basket, ensuring they don’t touch. Cook for 15-20 minutes, flipping halfway through, until crispy and cooked through. You may need to cook in batches. The result is less greasy but still remarkably crispy.
- Oven-Baked Finish: If you’re frying on the stovetop and want an extra-crisp finish, after frying, you can place the chicken on a rack in a preheated 400°F (200°C) oven for 5-8 minutes. This helps render any remaining fat and crisps up the skin even more.
- Small Kitchen Hack: If you have limited pot space, use a deep skillet for frying and cook the chicken in smaller batches, or bake in the oven entirely at 425°F (220°C) for 35-45 minutes. While not the classic texture, it’s a great alternative.
- Dietary Swaps: For gluten-free, use a 1:1 gluten-free flour blend or even crushed cornflakes or panko for dredging. For a vegan version, use thick-cut mushrooms or cauliflower florets, and substitute buttermilk with plant-based milk mixed with vinegar.
- Troubleshooting: If your crust is too thick or falls off, you might have pressed the flour on too lightly or let the coated chicken sit too long before frying. If the chicken is too salty, reduce the salt in the dredge by half next time and skip any extra salt after frying. If it’s dry, ensure you’re not overcooking—rely on a thermometer and pull it at 165°F. For a thicker dredge, add a tablespoon of cornstarch to your flour mix; for a lighter dredge, use less flour and more seasoning.
Common Mistakes to Avoid
Even seasoned cooks can slip up. Here are the most common pitfalls and how to sidestep them.
1. Overcrowding the Pot: This is the #1 mistake. Adding too many pieces at once drops the oil temperature drastically, resulting in oily, soggy chicken instead of a crisp crust. Always fry in batches, allowing the oil to return to 350°F (175°C) between batches.
2. Wrong Oil Temperature: If the oil is too hot, the outside will burn before the inside is cooked. Too cool, and the chicken will absorb excess oil. Use a thermometer for accuracy—it’s the best tool for perfect results.
3. Skipping the Marinade: Marinating in buttermilk is optional but highly recommended. Skipping it might lead to less flavorful and slightly tougher chicken. If you’re short on time, even 30 minutes makes a difference.
4. Under-Seasoning the Flour: Taste your flour mixture before dredging. It should be well-seasoned, as most of the flavor will be on the crust. If it tastes bland, add more salt and spices.
5. Not Letting the Chicken Rest: Cutting into chicken straight from the fryer will cause all the juices to run out, leaving you with dry meat. Resting allows those juices to redistribute.
6. Using the Wrong Oil: Avoid oils with low smoke points like olive oil, which can burn and impart bitter flavors. Stick to high-smoke-point oils like vegetable, canola, or peanut.
7. Wet Chicken: If you don’t pat the chicken dry before dipping it in buttermilk, the marinade won’t stick, and the dredge won’t adhere properly. Moisture is the enemy of crispiness.
Storage / Maintenance Tips
Proper storage is essential to keep your fried chicken delicious and safe.
- Refrigeration: Once cooled completely (within 2 hours of cooking), store leftovers in an airtight container or wrapped tightly in foil in the refrigerator. It will stay fresh for 3-4 days. Placing a paper towel inside the container can help absorb excess moisture and keep the crust from getting too soft.
- Freezing: For longer storage, freeze cooled chicken in a single layer on a baking sheet until solid, then transfer to a freezer bag or airtight container. It will keep for up to 3 months. The texture may soften slightly upon thawing, but it will still be tasty.
- Reheating (The Right Way): To maintain that glorious crunch, avoid the microwave if possible, as it tends to steam the chicken and make the crust soggy. The best methods are:
* Oven: Preheat to 375°F (190°C). Place the chicken on a wire rack over a baking sheet and heat for 10-15 minutes until hot and crisp.
* Air Fryer: Reheat at 350°F (175°C) for 3-5 minutes. It revives the crunch beautifully.
* Stovetop (Skillet): For a quick re-crisp, heat a skillet over medium heat with a tiny drizzle of oil and place the chicken in for a few minutes per side until warmed through.
- Avoid Sogginess: If you must use the microwave, heat in short intervals and consider patting the chicken with a paper towel first. Add a splash of liquid (like broth or water) to the container when reheating in the oven if the chicken seems dry.
Conclusion
Mastering the art of homemade Fried Chicken is a rewarding culinary skill that brings joy to any meal. By focusing on key techniques like proper marination, consistent dredging, and precise oil temperature control, you can achieve a perfectly crispy fried chicken that rivals any restaurant. This recipe is all about patience and attention to detail, but the result is absolutely worth the effort.
Don’t be afraid to experiment with your own favorite spices or dipping sauces. Share your creations with friends and family, or save this guide for your next gathering. What’s your go-to side dish for fried chicken? Let us know in the comments below, and feel free to rate the recipe if you give it a try!
FAQs
Q: Can I use chicken breasts only, or is bone-in better?
A: You can absolutely use boneless, skinless chicken breasts or even tenders. Just note that they cook faster—reduce the frying time to about 6-8 minutes and monitor the internal temperature closely to avoid overcooking, as they can dry out more easily than dark meat.
Q: How do I know when the chicken is fully cooked without a thermometer?
A: While a thermometer is strongly recommended for accuracy, you can check by piercing the thickest part of the chicken with a fork. If the juices run clear (not pink) and the meat feels tender (not tough), it’s likely done. However, for food safety, especially with dark meat, a thermometer ensuring 165°F (74°C) is your best bet.
Q: Can I bake the chicken instead of frying it?
A: Yes! To bake, preheat your oven to 425°F (220°C). Coat the chicken as directed and place it on a wire rack over a baking sheet. Spray or drizzle lightly with oil and bake for 35-45 minutes (flipping halfway) until golden and cooked through. The crust will be different—less greasy but still flavorful.
Q: What’s the best oil for frying chicken?
A: Neutral oils with high smoke points are ideal: vegetable oil, canola oil, peanut oil (adds a subtle flavor), or avocado oil. Avoid extra virgin olive oil due to its low smoke point and strong flavor.
Q: How long does fried chicken last in the fridge?
A: Properly stored in an airtight container, it will last 3-4 days. Reheat thoroughly using the oven or air fryer method for the best texture. Discard if it develops an off smell or appearance.
Q: My crust is falling off—what did I do wrong?
A: This usually happens if the chicken was too wet before dredging, or if you moved it too much in the oil. Pat the chicken completely dry before starting, and avoid flipping the chicken more than once during frying. Let the coated chicken sit for a few minutes before frying to help the coating set.
Q: Can I make this recipe with frozen chicken?
A: It’s not recommended to fry chicken while still frozen, as it will cool the oil too much and cook unevenly. Always thaw chicken completely in the refrigerator before starting this recipe. For a safe thaw, allow about 24 hours for 3-4 pounds of chicken in the fridge.
